Hike Devil’s Garden Trail in Arches National Park
Arches National Park is a great place to get acquainted with Southeast Utah. The whole area feels like an alien landscape, which, if you’re like me, calls you to explore.
Arches National Park hosts a wide variety of geological formations, including arches (obviously), spires, pinnacles, towering walls, and giant sandstone fins. Hiking is without a doubt one of the better ways to explore the park, and perhaps the best hike to set your sights on is the Devil’s Garden Trail.
The Devil’s Garden Trail is the longest and most difficult trail in Arches National Park. The entire loop is 7.9 miles long, with sections of the trail that require rock scrambling and carefully traversing fins with a considerable drop-off.
Do not let this scare or deter you! A great characteristic of this trail is that you don’t have to complete the entire thing to see some amazing sights.
If you do decide to hike the entire loop, it’s possible to see 8 different and uniquely beautiful arches. However long you decide to hike for, you can be sure that it is time well spent in the National Park.
Without further ado, let’s take a look at what you can expect on the Devil’s Garden Trail!
Hiking Experience at Arches National Park
Overview of Devil’s Garden Trail
Here is a summary of what you should know about Devil’s Garden Trail in Arches National Park:
Video of Hiking Devil’s Garden Trail
Here is a video I put together of our hike through Devil’s Garden Trail in Arches National Park. I hope you enjoy the scenery as much as we did!
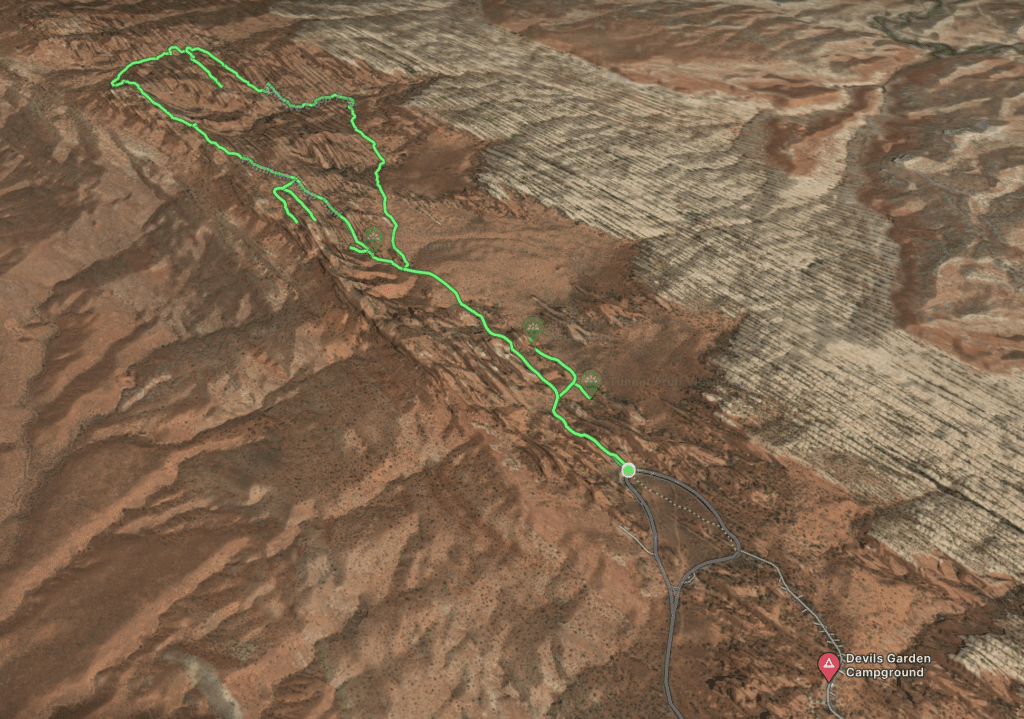
Location of Devil’s Garden Trailhead
Finding the Devil’s Garden Trailhead is pretty easy. Upon entering the park, you simply drive the Main Park Road until you reach the end. Devil’s Garden is the farthest you can drive into the National Park with a standard vehicle.
Parking
Depending on the time of year that you are traveling to Arches, parking at this trailhead can be a little tricky. Devil’s Garden is a highly popular trail, and it is for this reason that I recommend arriving at the trailhead as early as you possibly can.
Ideally, you should arrive before sunrise. Walking this trail as the sun slowly rises over the La Sal Mountains is a visual treat.
Hiking Distances
As mentioned above, the Devil’s Garden Trail doesn’t have to be completed in its entirety in order to be worth it. Based on your goals for the day, you can choose to seek out as many arches and points of interest as you would like.
The table below from the National Park Service provides great information about the distance to popular features to see along Devil’s Garden Trail. The distance shown in the table is based on a round-trip hike from the trailhead to each destination.
| Destination | Distance |
| Landscape Arch and back | 1.9 miles (3.1 km) |
| – Side trails to Pine Tree and Tunnel arches | add 0.5 miles (0.8 km) |
| Double O Arch and back | 4.1 miles (6.6 km) |
| – Side trails to Navajo and Partition arches | add 0.8 miles (1.3 km) |
| Dark Angel and back via main trail | 4.9 miles (7.9 km) |
| Dark Angel and loop via Primitive Trail | 6.6 miles (10.6 km) |
| Total distance, including all spur trails | 7.9 miles (12.6 km) |
What to Expect on the Devil’s Garden Trail
At the Trailhead
Once you’ve (hopefully) found a parking spot, the first thing you will see at the trailhead are the restrooms. Unless you fancy going in the brush, utilize this opportunity before heading out.
The trailhead also hosts a board that is filled with important information such as maps, warnings, and tips for having the best experience on the trail.
As you begin your trek, remember to always follow Leave No Trace principles. As stewards of our public land, we want to preserve this extraordinary landscape for as long as possible.
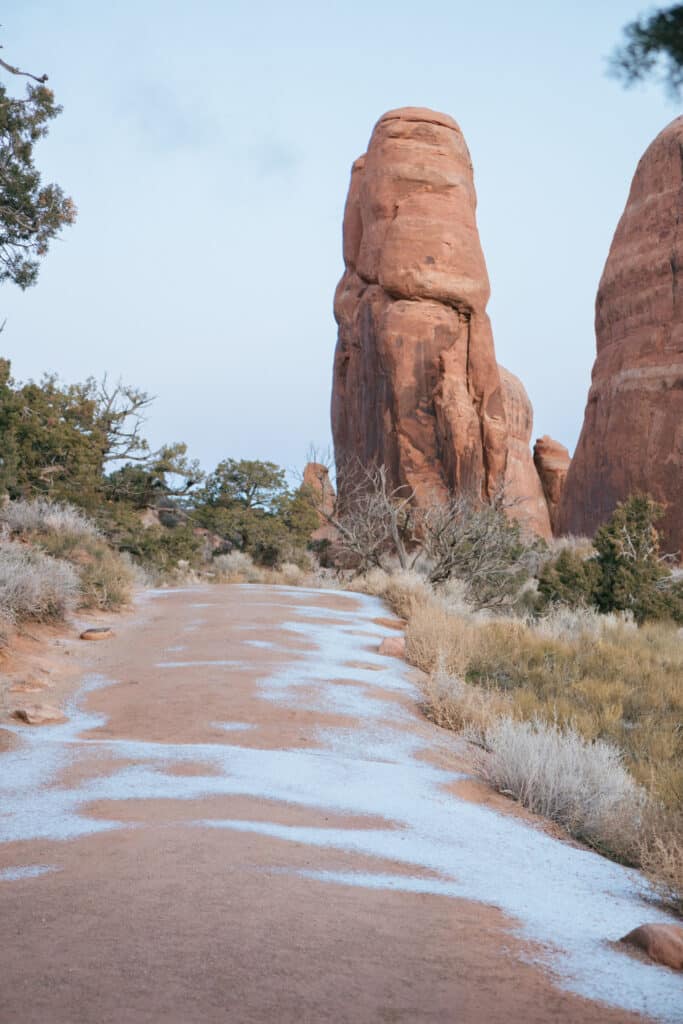
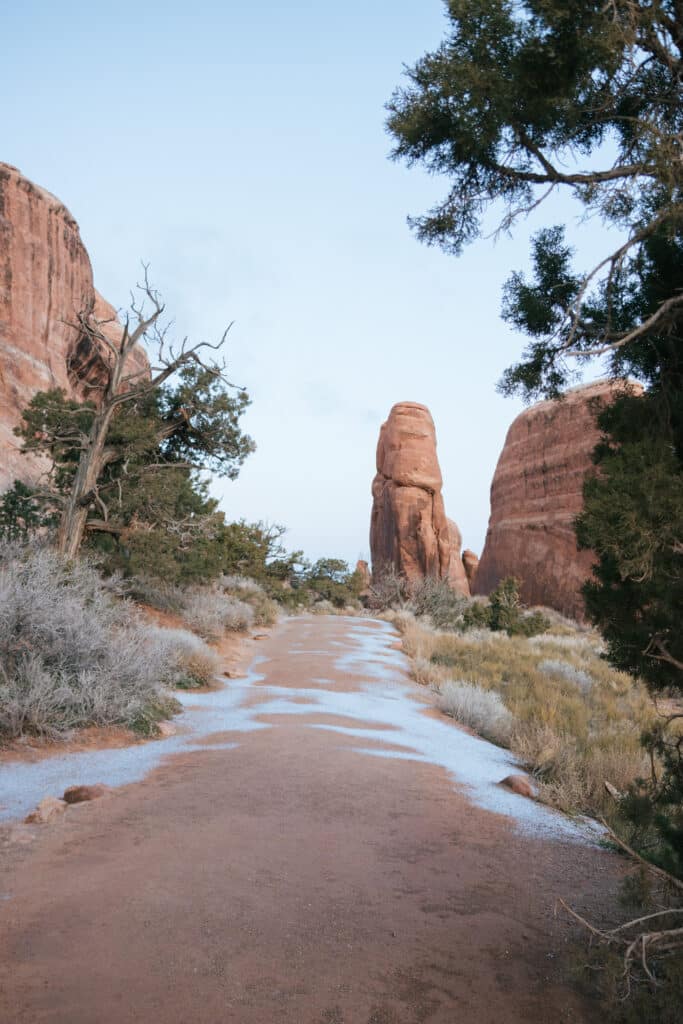
Pine Tree Arch and Tunnel Arch
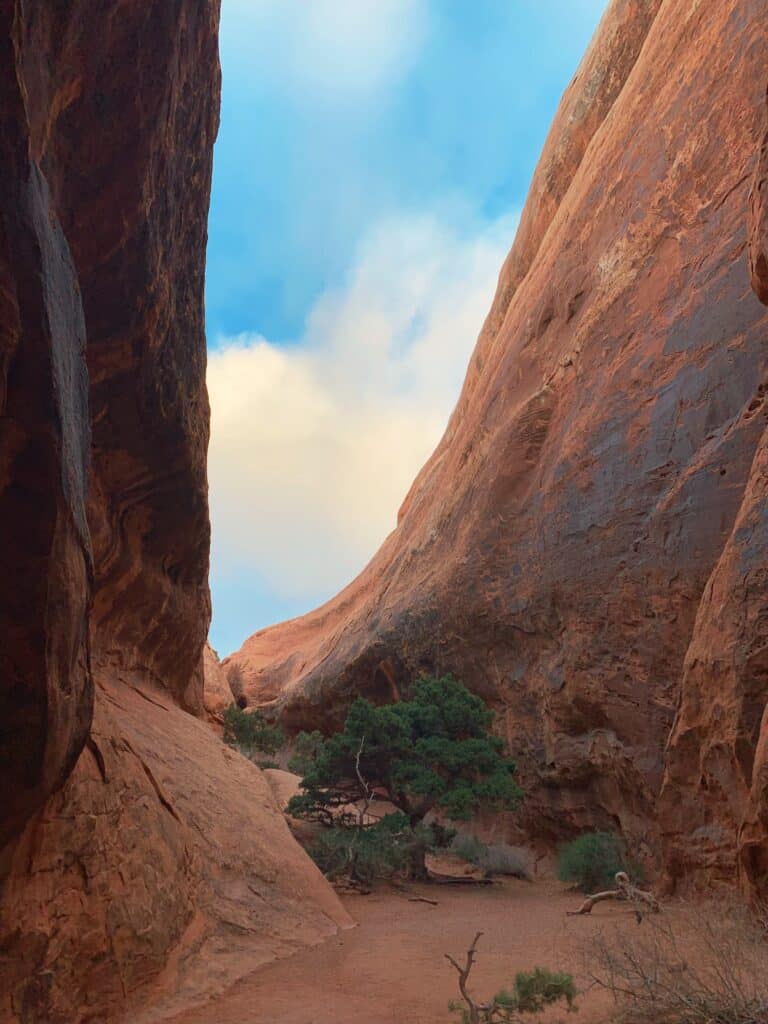
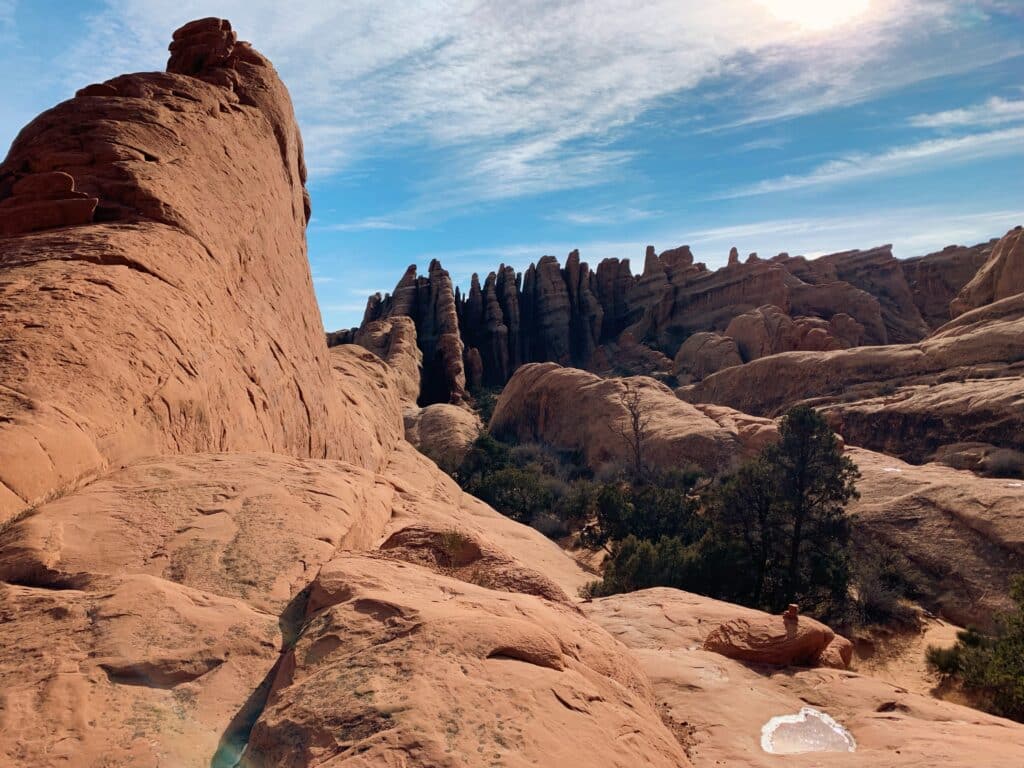
At the start of the trail, you will immediately walk between lofty sandstone fins. It is certainly a dramatic way to begin a hike. An interesting fact to note about these giant fins is that, eventually, they will erode and become arches.
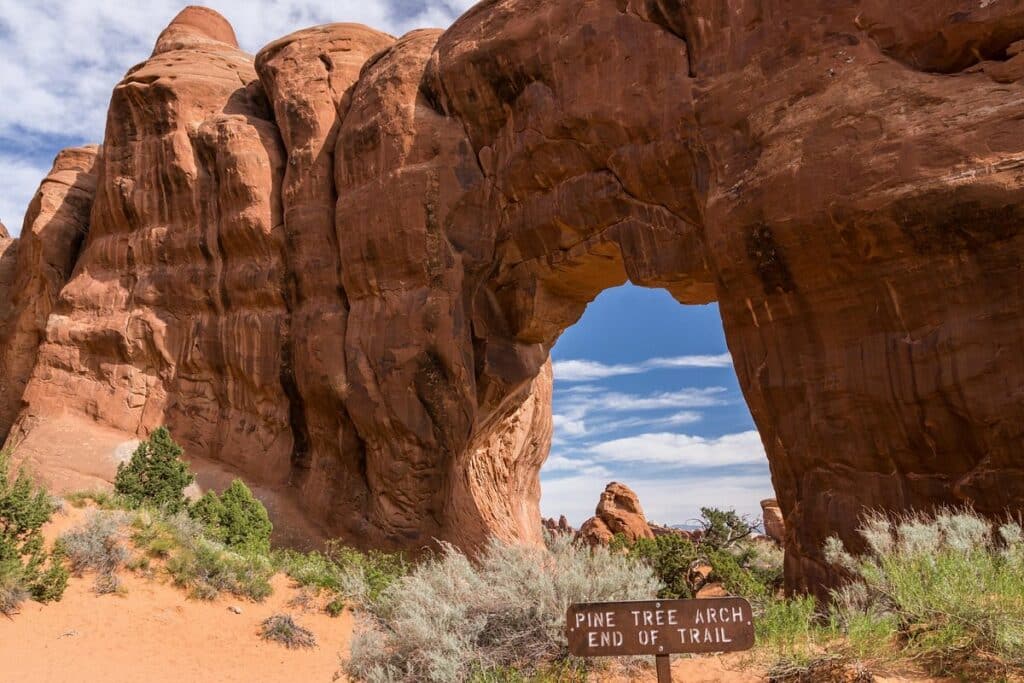
About 0.2 miles after starting the trail, there will be a spur trail on the right side of the main trail. This is the first of many junctions that lead you to your first arches: Pine Tree and Tunnel Arch.
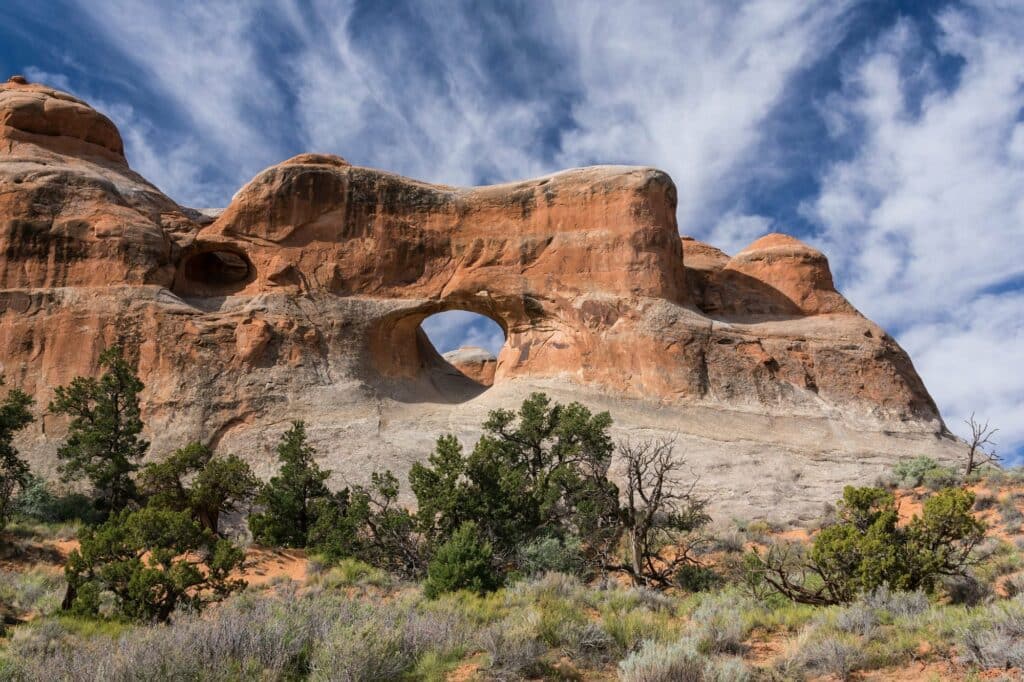
After another ~0.2 miles on the spur trail, there will be another fork. Turning right will lead you towards Tunnel Arch. The trail ends quite a ways from the actual arch, which means Tunnel Arch can only be viewed from a distance.
Even though you can’t get up close and personal with this arch-like some of the others, it is still a marvel. This arch gets its name from the way that it seems to “tunnel” through an impressively thick section of a sandstone fin.
The result is a window-like feature, nearly circular in appearance.
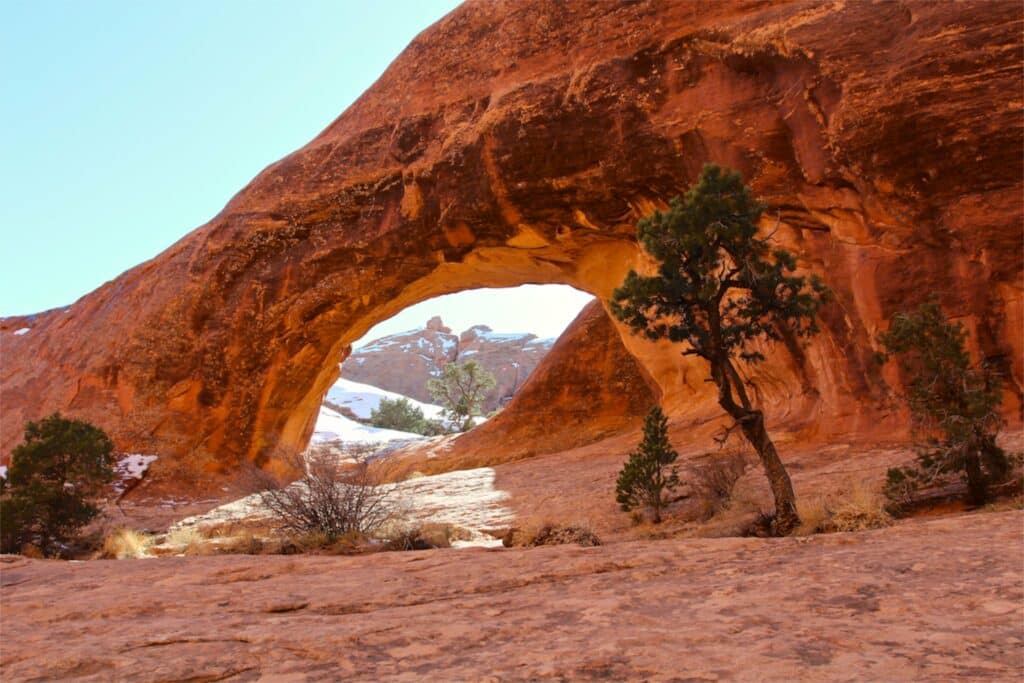
Backtracking the way you came and turning right at the intersection will lead you towards Pine Tree Arch. The trail provides access all the way to the arch. This arch is quite different from Tunnel Arch.
Pine Tree Arch is a “classic” arch that connects with the ground, which means you can even walk through or stand under it. This arch gets its name from the number of juniper trees that can be seen directly underneath the arch.
Primitive Trail Intersection
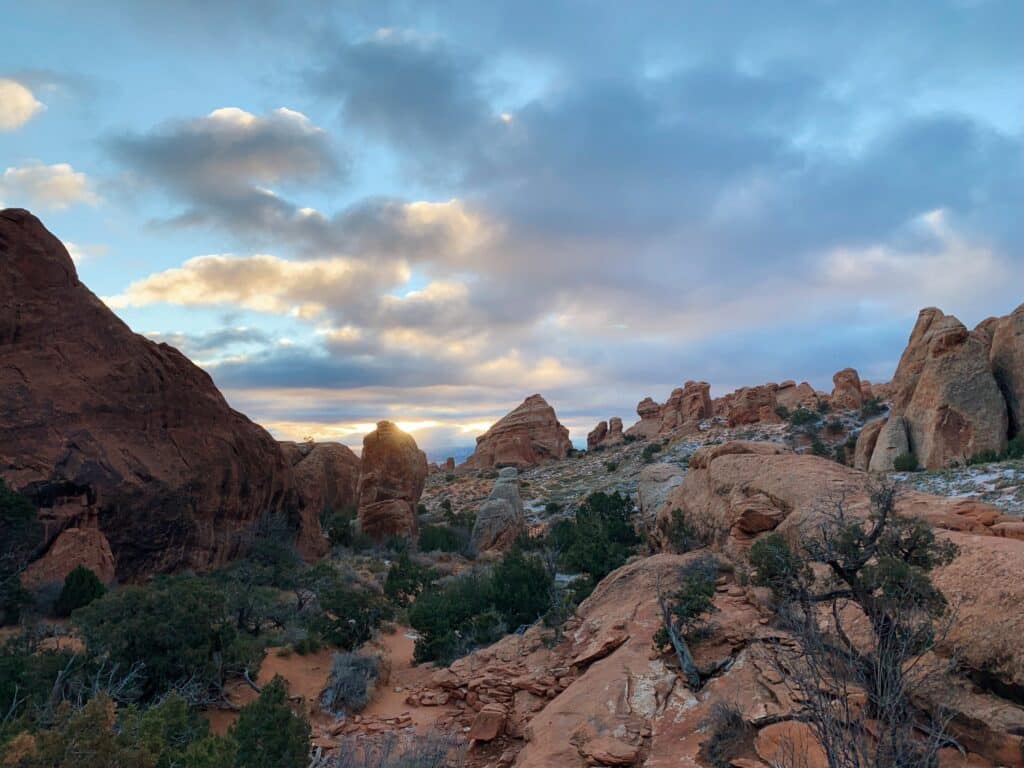
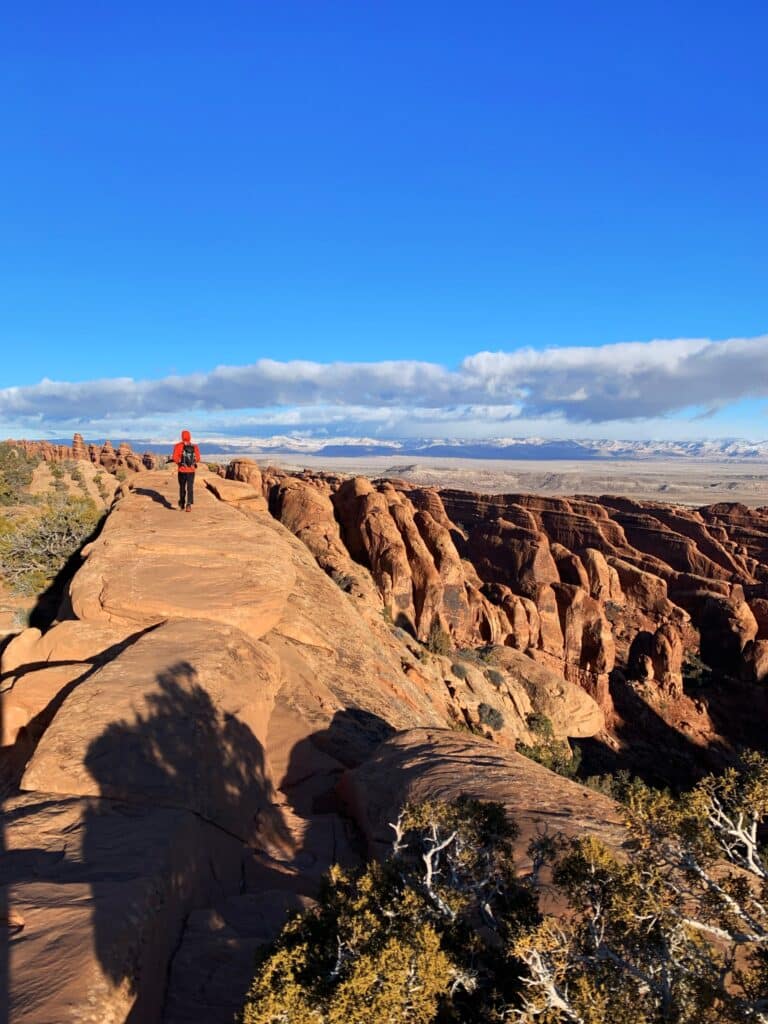
Once you get back to the main trail, the path will continue heading north towards the next arch. This section of the trail is by far the easiest.
The gravel path is wide and flat, and the views are spectacular. The variety of sandstone formations stretch out in every direction; shape, size, pattern, and tone are all factors that change from structure to structure.
About 1.4 miles into the trail (spur trail included), you will reach another fork in the trail.
Keeping to the left will lead you towards Landscape Arch on the main trail while going to the right will put you on the Primitive Trail.
If you decide to complete the entire loop, the Primitive Trail is the way you will head back towards the trailhead. For this route, we are staying on the main trail.
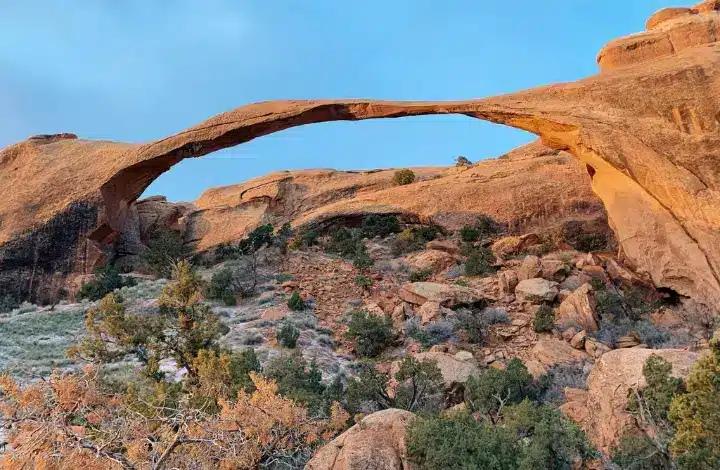
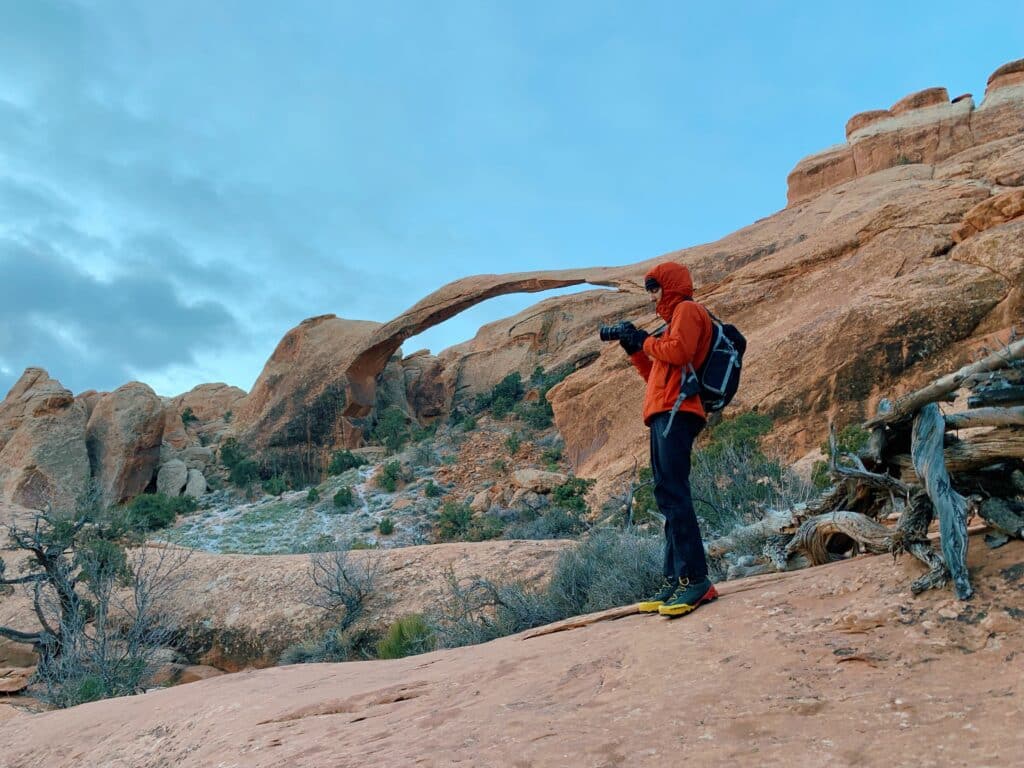
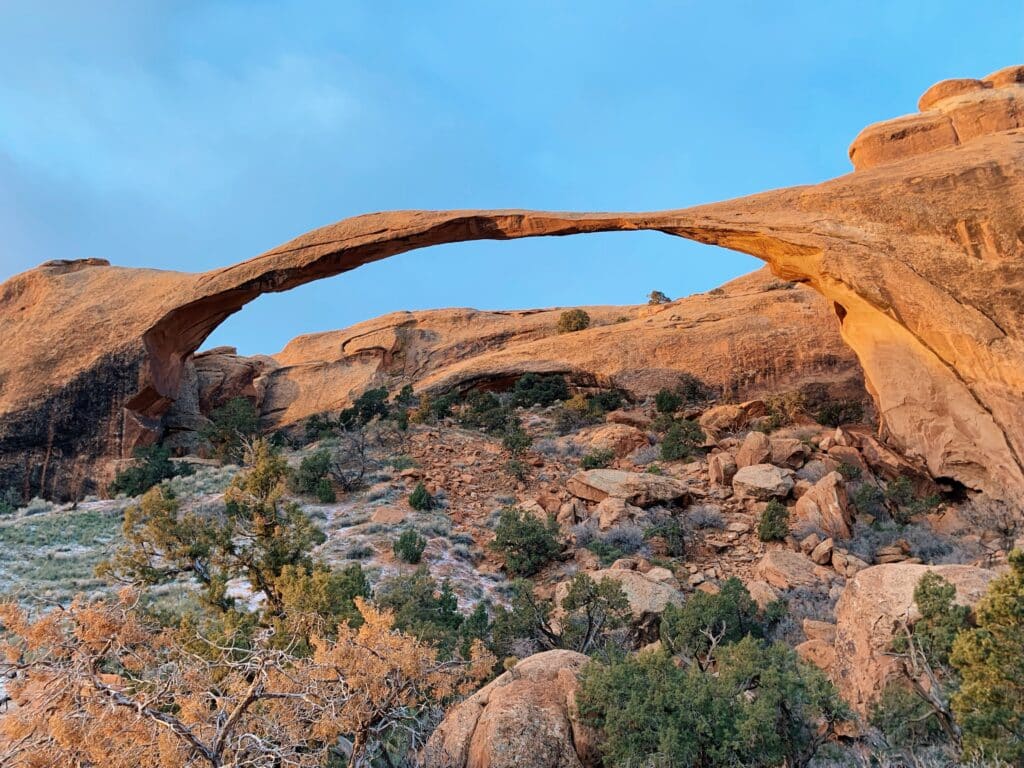
Landscape Arch
A little ways past the Primitive Trail intersection is the viewing area for Landscape Arch. Often considered the crown jewel of the Devil’s Garden Trail, Landscape Arch is quite the display of both hardiness and fragility.
Landscape Arch is the longest arch in all of North America. The 306 feet wide opening in the rock is impressively expansive.
Looking at the arch, the only thing I could think about was how skinny it appeared. At its narrowest, the arch is only 6 feet in diameter. Within the world of arches, that is quite small.

The arch didn’t always appear this way, of course. As recently as 1991, a slab of sandstone 60 feet long fell from the underside of the arch, crashing into the earth below.
Rockfalls such as this continue to weaken Landscape Arch. At some point in the future, Landscape Arch will have the same fate as Wall Arch.
With that being said, enjoy the arch while you can. There are multiple angles to capture the beauty of Landscape Arch, so soak it all up!
Navajo Arch and Partition Arch
Moving past Landscape Arch, the trail becomes considerably more difficult. If all you are looking for from this trail is an easy stroll, spotting a few arches in the process, you may consider turning back after reaching Landscape Arch.
If you’re up for some rock scrambling, however, this is the point where the trail becomes pretty fun.
Leaving the safety of the ground, the trail quickly takes you directly up the side of a sandstone fin. This terrain is surprisingly steep. After climbing the ~200 vertical feet, the spur trail for Navajo and Partition Arch quickly approaches on the left.
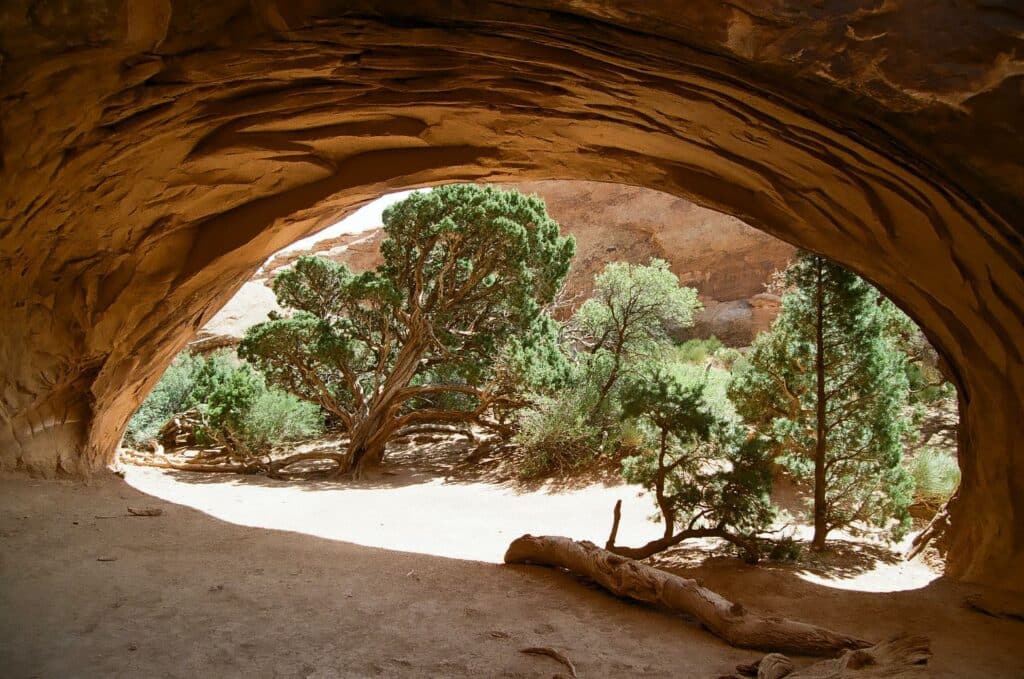
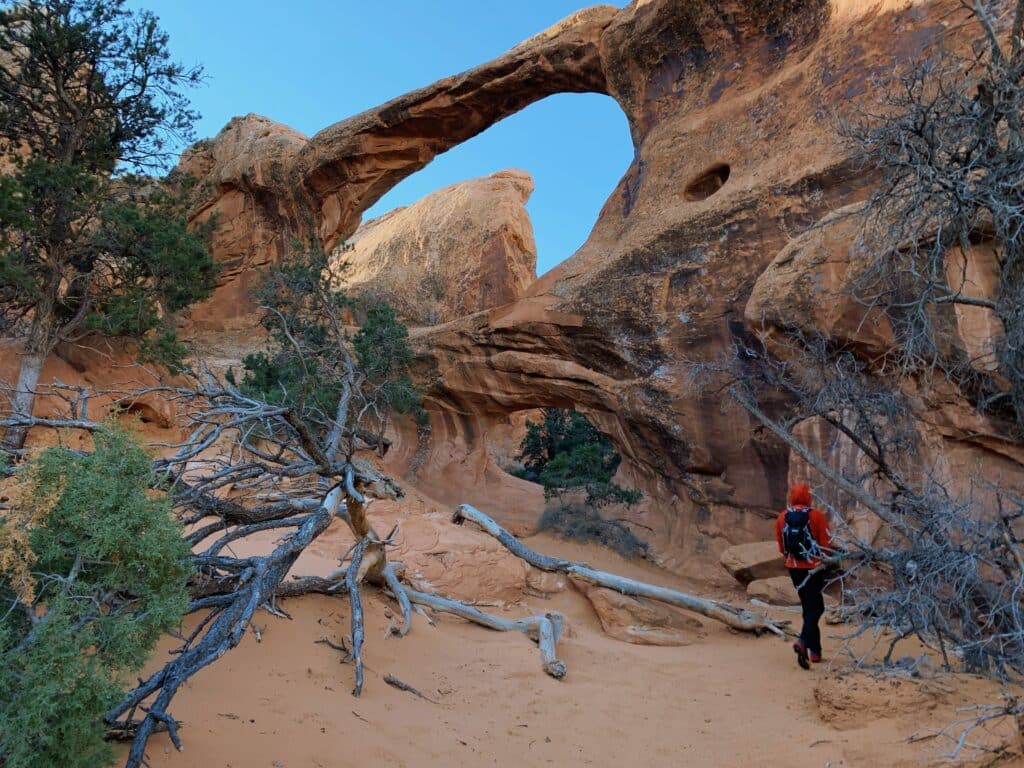
The farther of the two, Navajo Arch, at first appears to be more of a cave than an arch. Once you get closer it becomes clear that there is indeed an opening on the other side.
This arch was one of my favorites, mainly because it almost felt like a secret, separate area. Be sure to enjoy the lone tree that resides within that secret area.
After spending time at Navajo Arch, go back the way you came and look for the trail to Partition Arch on the right. Partition Arch gets its name from the very prominent “partition” that separates the arch into two sections.
One side is wide and large enough to walk underneath. The other side is a smaller, circular opening sometimes referred to as a window.
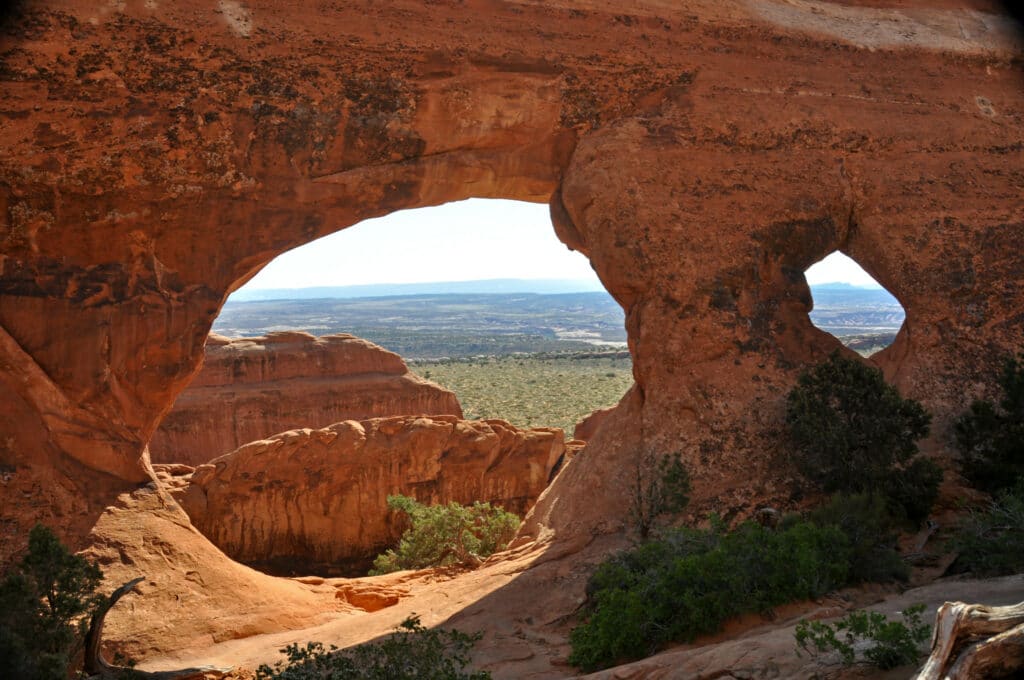
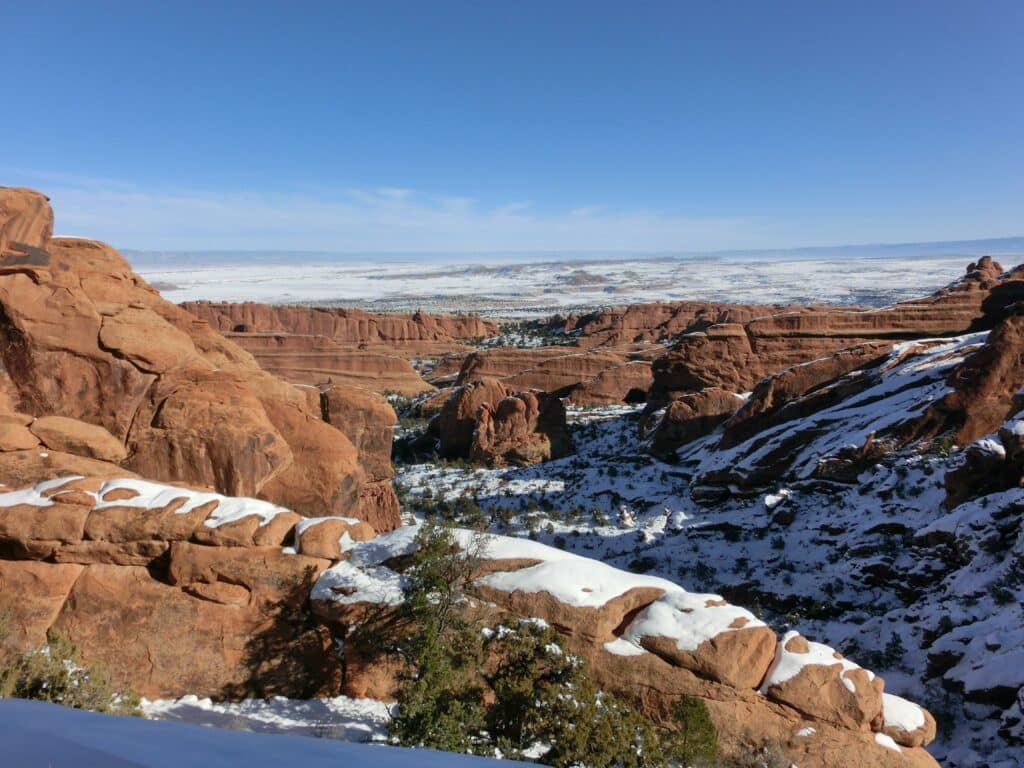
The view from this vantage point is excellent. Massive sandstone fins sit on the left side of your view, while a wide-open expanse to the right lets you see for what feels like miles and miles.
Black Arch Overlook
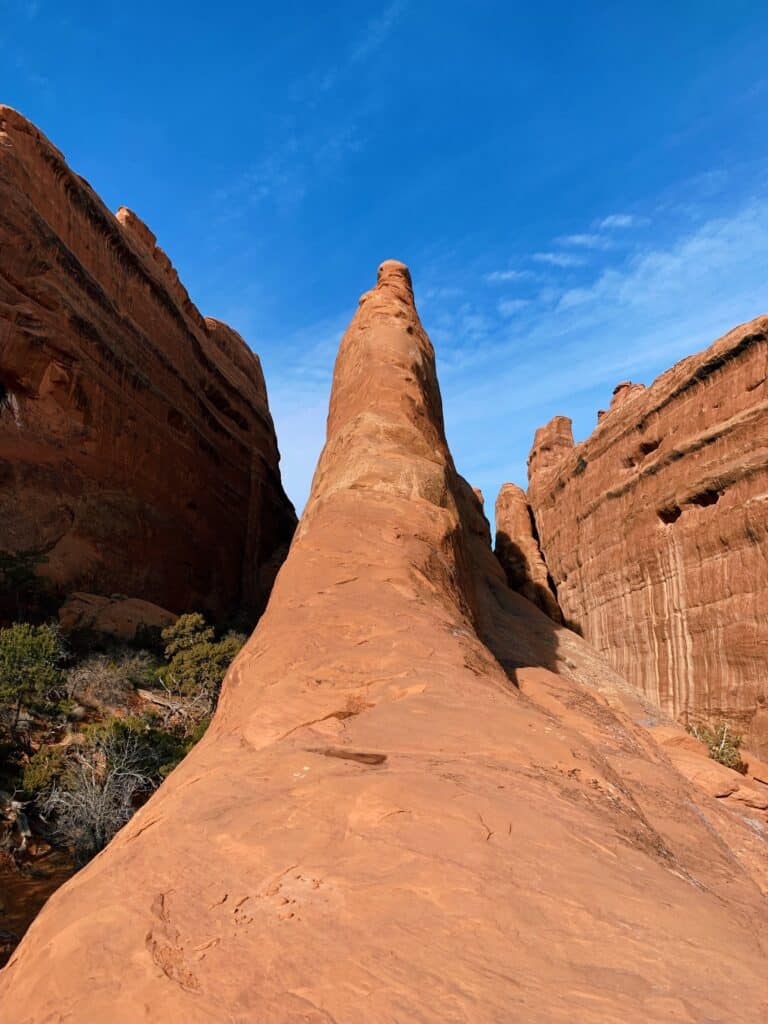
Retrace your steps to get back to the main trail. The path will continue as a simple dirt trail, until you eventually reach the beginning of another sandstone fin.
Following the signs for Double O Arch, scramble up the fin and enjoy the views from the top.
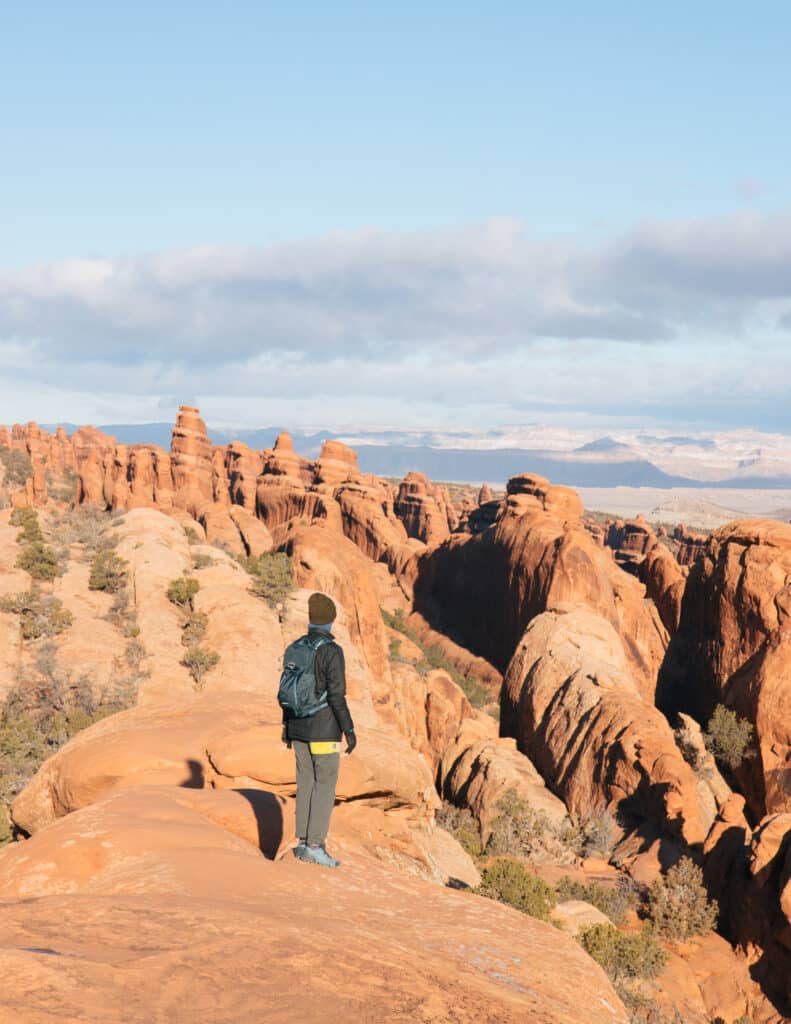
As you walk along this relatively short fin, pay attention to where you are stepping. Keeping a close eye on children in this area is especially important; falling off the edge would almost certainly result in some sort of injury for anyone.
After crossing the entire feature, the trail picks back up on the ground. Shortly after this point, you will see a sign for the Black Arch Overlook.
This arch doesn’t get as much love as the other ones, mainly due to how far away it is. Far down in the valley with a maze of fins all around it, the Black Arch stands out prominently, resembling more of a cave than a typical arch.
Even though this point of interest can be a little underwhelming, the Black Arch deserves credit for being the most mysterious looking arch on the trail.
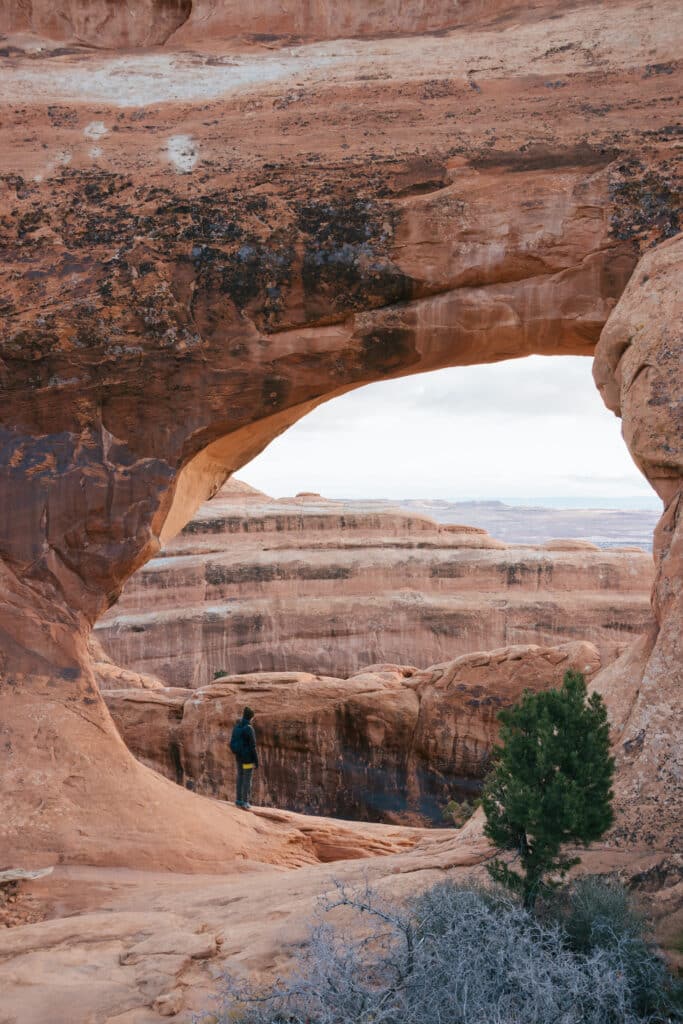
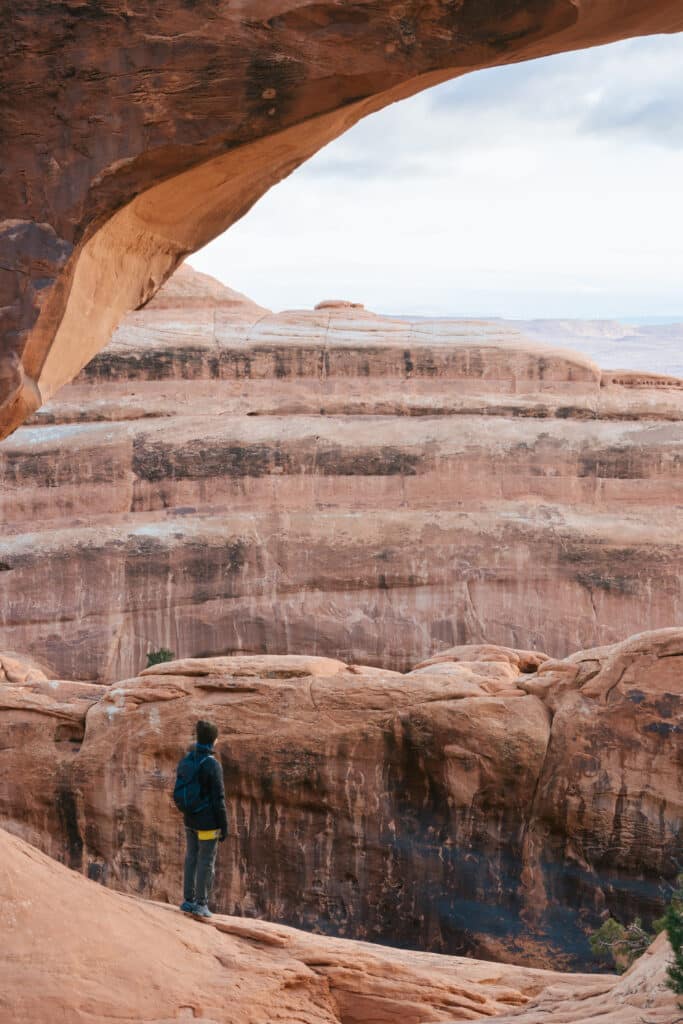
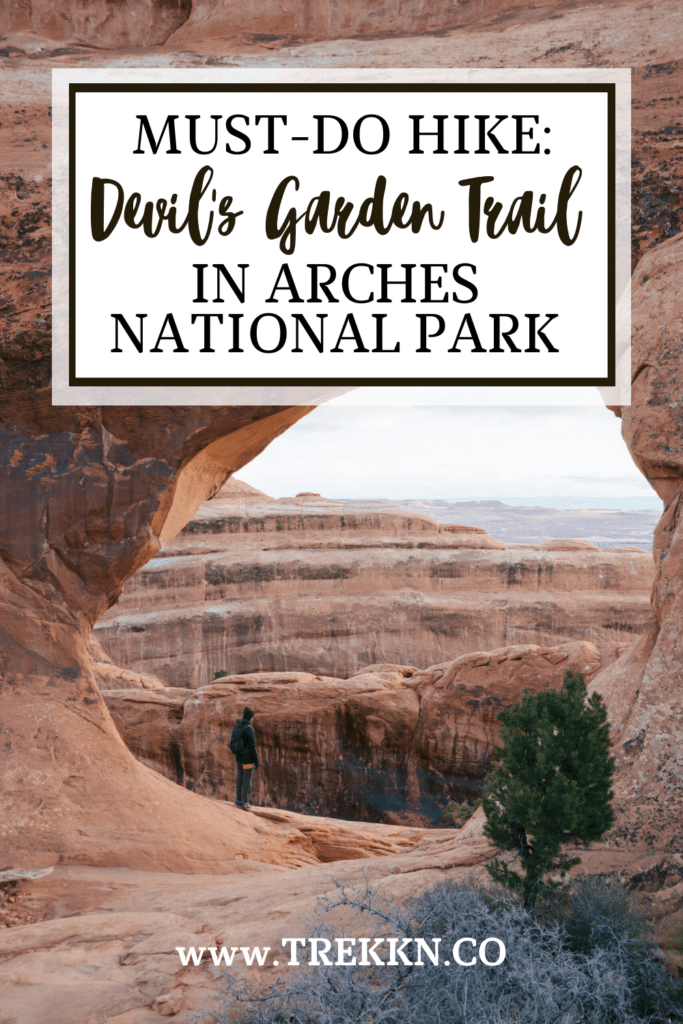
Double O Arch
Continuing on, the main trail will head northwest for the next 0.4 miles, soon reaching a pretty steep and sometimes slick slope. At this point, Double O Arch will be visible on your left.
Don’t get too distracted though! Carefully work your way down the sandstone, and take a sharp left turn at the end.
It’s immediately clear how this arch got its name. You can walk right up to the base of Double O Arch, admiring everything from the smallest details in the rock to the spectacular formation of the two separate openings.
A larger arch sits on top of a smaller window below it, creating the famed Double O shape.
Hike directly under the smaller arch to get some different views from the other side. But, as always, never stand on top of any of the arches.
Dark Angel
Facing towards Double O Arch, there will be a signpost 20-ish feet to the right.
The four different signs on this post can be a little confusing, and we ended up going the completely wrong way and had to turn back. So, to avoid that mistake, take a left at the signpost to head on the spur trail leading towards Dark Angel.
Dark Angel is not classified as an arch, but rather a pillar. If you’re only interested in seeing arches on the trail, feel free to skip this 0.8 mile detour.
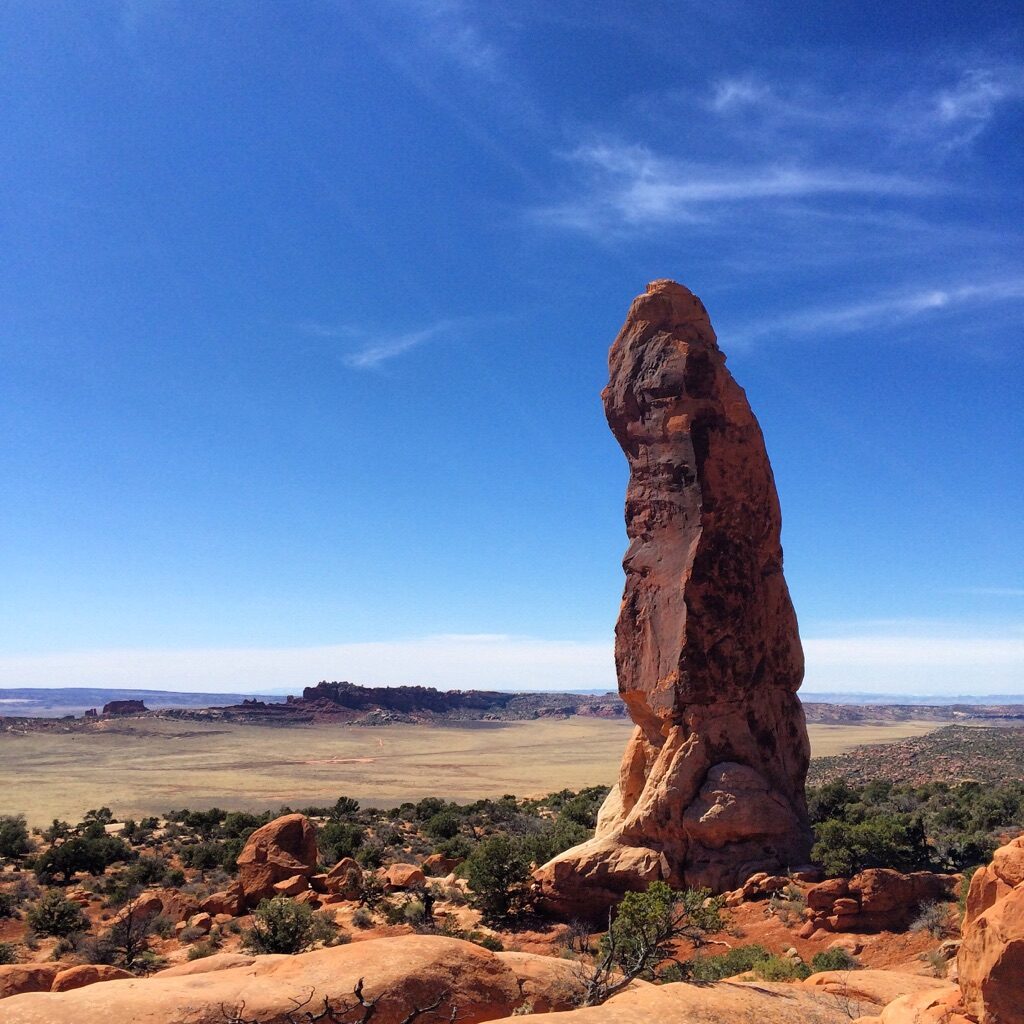
The dark-colored sandstone pillar sits alone at the northern section of the park. It is quite the sight, especially in contrast to some of the other sandstone formations you have seen on the hike so far.
Taking this spur trail out to the Dark Angel isn’t super popular, which means you might experience some solo serenity for a little while.
From what I’ve heard, this area is also host to some fairly unknown petroglyphs. If that’s your thing, keep an eye out for them.
Primitive Trail from the Devil’s Garden Trail
Back at the signpost intersection, head on the trail that’s referred to as the Primitive Loop (or Primitive Trail).
At this point in the hike, you have seen quite a bit and may wish to simply turn around and head back the way you came via the Devil’s Garden Trail. Taking that route will be about a 2.2 mile hike back to the parking lot.
If you don’t feel done with the trail yet, you can continue on the Primitive Trail, which will be about a 3.5 mile hike, looping back to the parking lot.
This trail is called primitive for a reason; most of the way back you need a keen eye to spot cairns that tell you which direction to go.
If you don’t feel confident in your ability to stay on track, either take the main trail back or make sure to have a trail map downloaded on your phone using software such as FATMAP or AllTrails.
Private Arch
The Primitive Trail is a very enjoyable section of the hike. The next half a mile will have you meandering through a variety of terrain, steadily dropping in elevation towards the start of the Private Arch spur trail.
Turn right onto the spur trail, and simply follow the trail all the way to its end (0.3 miles). This is an appropriately named arch, due to the fact that you won’t see a glimpse of it until the very end of the trail around a corner.
This arch was another favorite of mine. The whole area felt far away from the rest of the more populated areas on the trail. The only thing we could see was sandstone and the only thing we could hear was silence. Private Arch made for an ideal spot to stop for a snack.
Ending the Devil’s Garden Trail
After returning to the Primitive Trail from Private Arch, the trail will become a little bit harder to follow. Pay close attention to where the cairns are sitting, making sure to never move, disassemble, or create cairns.
You may believe that you are helping out other people by placing cairns, which may be true, but the idea is to leave as little a trace as possible. The cairns that already exist are enough to guide people through, even if it may be a little difficult at times.
The last couple miles of this trail are a joy. No more spur trails will appear for the rest of the hike, so enjoy soaking in every interesting feature, sight, and smell you can as you approach the end of the trail.
Before you know it, the Primitive Trial will meet up with the main Devil’s Garden Trail. This is the same intersection you saw at the beginning of the hike. Take the trail to the left to head towards the parking lot, or, if you haven’t had your fill, turn right to get another glimpse of Landscape Arch.
Tips for a Successful Hike
- PLAN AHEAD. Plan out your route beforehand. Will you complete the entire loop via the Primitive Trail? Will you turn around after Double O Arch?
- WATER & SNACKS. Pack a bag that meets the requirements for your planned route. Do you have enough water for 8 miles of hiking? What about snacks to fuel your body?
- KNOW THE ROUTE. Before heading out on the trail, study a map of the area to at least have a general idea about what the trail looks like.
- CARRY A MAP. Download a trail map, if possible. Even if I’m hiking in an area that has decent service, I will typically have an offline map on my phone to make things easier. You can also carry a paper copy as a back up in case your phone runs out of battery power.
- WEATHER FORECAST. Check the weather/trail conditions. During the summer, heat and sun exposure will be your main concerns. During the winter, icy slopes and sub-freezing temps will be big factors. What time of year are you going? How can you pack to be as comfortable as possible?
- DEPARTURE TIME. Decide a departure time based on your wants or needs. Do you mind hiking with a ton of people around? Or would you prefer a more quiet hiking experience? If you answer yes to both questions, getting an early start on the trail is in your best interest.


Josiah B gained invaluable experience while living on the road with his family, during which time he felt overcome with the desire to continue exploring. That search landed him in Seward, Alaska, where he currently resides. His love for the outdoors is welcome with open arms in the Last Frontier, and with an endless amount of hiking and backpacking to be done, he’s eager to share the best that Alaska has to offer.